Baking Paper VS. Silicone Mat


Salted Caramel
Pop Corn Macarons

♦ ♦ ♦ ♦


♦ ♦ ♦ ♦ ♦ ♦ ♦
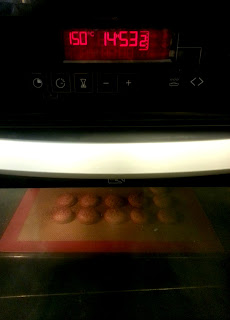
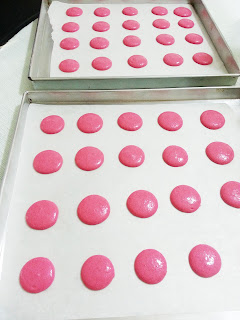
Baking Paper
VS
Silicone Mat

♦ ♦ ♦ ♦ ♦ ♦ ♦


PROs & CONs

    Glad Baking Paper    

+ Bottom surface cooks better.
+ Never stick to the Baking Paper.
+ Standard throughout the whole batch.

- Free hand pipe your Macarons into 'almost-similar' sized circles.
- May need template to get uniformed size circles throughout.

 ♦ ♦ ♦

    Lekue Silicone Mat   
+ Uniformed size circle Macarons.
+ Bottom surface is shiny.
(Both good & bad. Bad coz the bottom shells look like it won't absorb the fillings.)

- Bottom surface not consistent. Some stick to the Mat.
(Half of it suffers from what looks like an aftermath of an upside down volcanic eruption in Indonesia)
- Issues with heat.
(If increasing baking time solves the uncooked bottom issue, top surface will take it's toll, suffering from some slight burn)


Glad Baking Paper from NTUC - S$3.50  |  Lekue Silicone Mat from Tangs - S$38


♦ ♦ ♦ ♦


Stay Tuned for more:
Experimental Packaging. Sneak Peek below.
Burger Box with Chocolate Burger Macarons


Palate Sensations Cooking School


Hands-On Macaron Class
@ Palate Sensations Cooking School
(with Chef Felicia Khoo)


Sooooo, after watching 'Locked Up Abroad' on NatGeo, I decided that I wasn't going to waste anymore eggs. Don't ask me how that linked – Im a Twisted Conscious Being.
Continue reading at own risk.


Ok actually, the thought of those inmates fighting for some bread-gone-wrong, while here i was, thrashing away even the freshest batch of Macarons, was revolting.


♥ ♥ ♥ ♥


Hands-On:

Chocolate Macaron

56% Dark Chocolate Ganache

Strawberry Mousse

Strawberry Compote/Sauce


• • • • • • • • • • • • • • • • • • • • • • • • • • •


I had the Sunday class which runs from 10am – 1pm.
Price: S$150

Aside to the class conducted by Felicia, who is now officially part of Palate Sensations team (Congrats!), I was loving the Kitchen settings. Kinda like Hell's Kitchen minus the tension. And Ramsay.


There was another class on the other side.
Think it was some Chinese Cuisine. Smell was uhmazing!


♥ ♥ ♥ ♥


Macarons
The French Method.


My Stash


We didn't add in Cream of Tar Tar, so try not to over beat your egg whites.


Macaronage.
(the mixing of dry ingredients to your meringue)


Dusting some cocoa powder on top


Remember to rap the tray a coupla times against the countertop once you've finished piping.


Letting them rest before popping in the oven. They dried quite fast though. Not sure if its the air-conditioned kitchen, the powdered egg whytes or the amount of actual egg whytes.


150 degree Celsius for 15 mins. Macaron surface didn't burn.
(Unlike my usual 160C for 10 mins)


Observation 101:
 • • • • • • • • • • • • • • • • • • •

(1)
Inside was compact
(hardly any air-pockets)

(2)
Surface was glossy

(3)
Texture bit rough though

(4)
Might consider investing in Silpat


♥ ♥ ♥ ♥


First Attempt at Strawberry Mousse.


Adding Icing sugar to the whipping cream


Adding some strawberry puree


Voila!


Altogether Now 


I was busy taking pictures of my Macarons at 'anywhere-possible-for-Instagram' that I forgot to decorate my 'Act-Atas-Only' Plate. Usually, i'll just make sure it Looks good and thats about it. Taste, comes no-where close to second. Which is bad. (And that my friend, is the reason why Felicia is conducting and i'm being conducted)


Here is everyone's Plated Dessert Presentation.


Wonder if they rent some space out for us to bake by ourselves.
Definitely coming back! Till we meet again,

Au Revoir

♥ ♥ ♥ ♥


Chef Felicia


Macawrong to Macaron


From Macawrong to Macaron
(My Earlier Stage - The French Method)

Dear God, please help me make some decent-looking-macarons and I'll do some Charity work.

♥  ♥  ♥

Ok, where do I begin..
Aahh yes, Cursings! Plenty of those. But don't worry, it'll get lesser once you're done reading my entire blog. I hope.

The images in this post are so far my best (Feet wise). Lord knows how many eggs I've wasted. I'll show you my first try-outs, which btw i failed, in a separate post. So was my 2nd, 3rd and. . . . the list goes on.


For now, the word "Perfect" is a bit far-fetched.

The obsession with wanting the perfect feet, was, and still is, driving me nuts (as if sifting those Almonds wasn't enough).

Just the Macaron Shells.
Was trying to test which Oven setting works best for these temperamental babies.


Ariston Oven


I've tried using all settings, and the two which i found to be the best was "Gratin" & the other, "Pizza"How odd.


This batch, i've used Parchment Paper as base. Seems ok. Though I prefer Silcon Paper (bit more pricy compared to Parchment). Baking Paper from NTUC is also another one of my fav. Easy to tear it off instead of having to cut it to fit your tray (like the Silicon/Parchment Paper from Phoon Huat or Bake King).

I keep a day job, so I'll do with whichever is convenient. That, and because I'm lazy.


I read thru a coupla blogs/youtube videos stating about the need to let them Macarons rest until they formed a so-called shell (Batter rested long enough so that it'll not stick to your fingers when touched).

But it seemed fine when I popped them straight in the oven right after piping. And considering that it makes my life alot easier. Alot. Alot.

Once, I waited close to 2 hours, just to let them rest. And it doesn't make a difference. Still clueless as to why though. The thing with Macaron is, you simply DO NOT have a solid answer to your Lord-knows-how-many-Questions. Basically, we're just guessing. Plus, maybe some luck.

My observation* for this batch.
*May not work for some, but it's worth a shot.

Left: No resting time & appears to have feet
Right: 15 mins resting time & feet appears to be higher


Gratin(left) Vs. Baking(right) setting.
The Baking Setting seems to have more holes/airpockets.


Oreo Macaron


1st Tray

1st Tray:

150℃ for 15 mins

Rested for 20 mins

Oven Setting: Gratin
(Top heating element + fan)

• • • • • •

Observation

(1)
Macaron Surface didn't burn

(2)
Feet was perfect & then started having minor holes after the 8th minute

(3)
Bottom bit soft. Should leave it in the oven for another 1-2 mins.


♦ ♦ ♦ ♦


2nd Tray


2nd Tray:

150℃ for 19 mins

Rested for 35 mins

Oven Setting: Gratin (8mins) +


Pizza (7mins)


Gratin: (Top heating element + fan)


Pizza: (Bottom heating element + fan)


• • • • • •

Observation

(1)
Macaron surface slightly burnt. Concluded that 17 mins works best (Macarons are cooked + retaining it's color). At the 18th minute onwards, color will be slightly brown. Best to not add any coloring when testing out oven settings.

(2)
Feet was better. Lesser holes. Not really sure if the main problem was "Heat Distribution" or something else.


Right: From the 1st Tray
Left: From the 2nd Tray


Bottom of Macaron from the 2nd Tray.


Pairing them up according to size. Need more practice on my piping.
I tried the Lékué Macaron Baking Mat from Tangs (S$38) and most had uncooked-bottom issues. Had no luck with it just yet. Will get to the bottom of it, pronto! Will try Silpat next.


Making Oreo Chocolate Ganache for the filling.

Didn't measure the ingredients for the Ganache coz I was abit disappointed about not getting it perfect. Used Nestle Cream & White Chocolate block + some crushed Oreo bits + Vanilla essence.


RECIPE:

Makes 15 Macarons
(30 shells)

110g Pure Icing Sugar
60g Almond Meal
50g Egg White
2 1/2 tbsp Caster Sugar
6g Powdered Egg White


♦ ♦ ♦ ♦


Ok bye!